Looking Like a Trench
More digging, and some measuring (I broke out the laser level today to get a good line along the front). I'm working my way along the trench, making it more square and clean as I go.
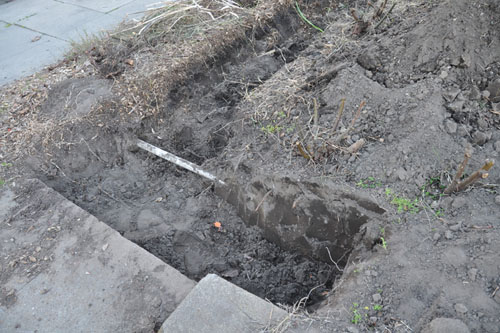
Some parts of the trench are starting to look very trench-like and official.
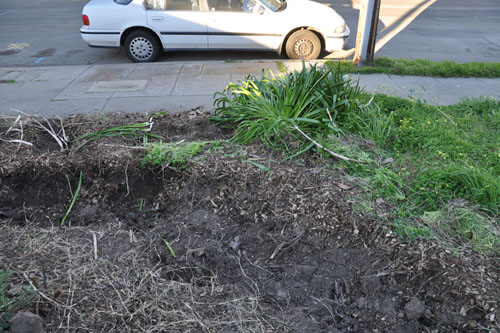
Today I spent some serious time making sure I had the turn in the right place, and then started the last part of that trench, which meant digging out two more roses on that side. I also started digging out the naked lady amaryllis, because the planting bed by the sidewalk is taller than I want it to be. The amount of digging in front of me got a little overwhelming: I'm not just digging out the trench to depth (and in some places the retaining wall will be almost entirely underground), but I want to dig down the front beds to be level with the sidewalk. That's going to mean moving a lot of dirt.
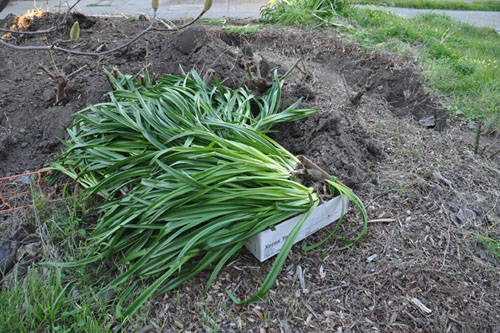
Luckily, the amaryllis came up very easily. They do look very dramatic stacked behind the spoils pile in the shade. As I dug them out it was pretty clear that they needed dividing, anyway. And the soil around them was loose and easily dug out, so that's a win.
Today was a great example of why I don't really like working out front very much. I mean, I love hanging out and gossiping with the neighbors, waving at their babies and all that sort of thing, but a lot of people walking by just don't seem to understand that it's perfectly OK with me if they don't talk to me. I won't be offended or feel like they are unfriendly if they have nothing to say and just walk by in silence, maybe with a smile and nod. Better that than get trapped in more weird conversations.
Guesses from passersby about what I was doing:
Bomb shelter
Addition to the house (???)
Irrigation
Drainage (?)
Escape tunnel (into the sewer, I guess??)
Number of people who stopped to tell me they are handymen who could help me with the job: 3
Number of people who said, "Wow, that's a big project": 4
When I got tired of idle conversation with every single person who walked by the house, I went inside and did some more calculations, this time working out how much rebar I'm going to put in the wall.
There's pretty much no way for this wall to not have way more steel in it than necessary, if I'm going to use any at all. #3 steel is nominally 3/8" in diameter, and unless the local supply place sells #2 (2/8", or 1/4" for those who don't speak contractorese), that's what we'll be using. I've never seen #2 rebar sold retail, but I admit it's not something I go looking for very often (it is very useful as an armature for concrete or clay statuary, though).
I'm doing a pretty simple rebar plan, verticals that end up being about every 14" because that works better for the pattern of the wall, and stronger column rebar in the pilasters.
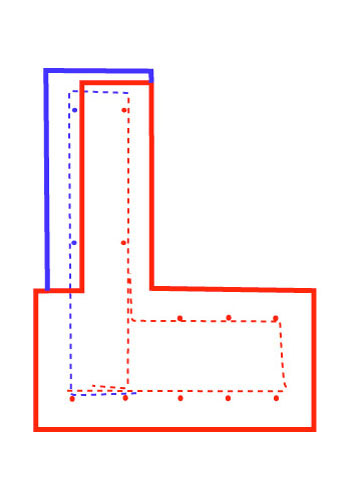
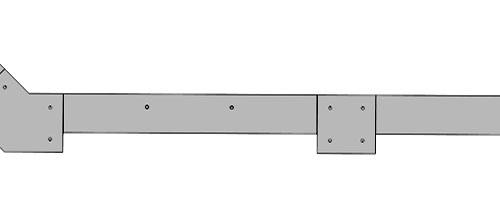
The section is still something I'm thinking over -- I've got a lot of steel in the footing, and I suspect I could reduce it by half without incident. (The blue outline and bars are the pilasters.) The total cost of steel is pretty minimal, though; pulling three of the horizonals from the footing would only save us $40. I know, at least as far as the engineering is concerned, that the wall would be designed to meet the loads it's likely to bear with no problem. I just need to grasp why the rule of thumb design says to put five bars across before I go pulling them out.
Also, I find it fascinating that rebar is sold in two lengths: 10' and 20' (at our local home center). For 10' rebar, the price is $3.15 per piece. For 20' rebar, the price is $3.97. Sure, it's hard to transport 20' pieces of anything, but I'm thinking we can just bring the big bolt cutters with us and chop a long piece into bits in the parking lot.posted by ayse on 02/09/11