Little Victories
We didn't get much done today. Well, Rosie got bathed and we decluttered a bunch of stuff out of the house, but as far as work on the bathroom project, not much happened, because we didn't have all the pieces we needed to do some more work on the wiring.
When we realized we didn't have everything we would need, we focused on getting things done that got us closer to the end goal: we connected up the ground wires in the junction box downstairs, then Noel wired an outlet. Of course, we didn't have the right kind of outlet in our stash, so the one he wired up is a placeholder until we can get the right one.
(We also accidentally forgot to restart the server after taking the power down to connect the grounds for the new subpanel, so apologies for the site being offline. Hopefully you were too busy eating eggs and chocolate to notice.)
So let's talk about pigtails.

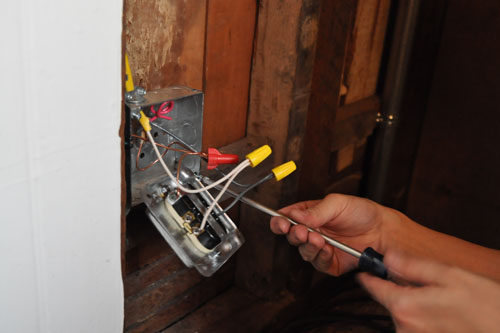
There are basically two ways to wire a fixture like an outlet or a light. You can run the wires directly to the fixture and wire it in place, or you can cut little pigtails and connect those to the fixture first, then wire-nut the wires together. You can see from the photo above that we opt for the pigtails.
Why would you do that? Because it makes doing more work on the fixture a little easier in the future. Changing out the thing you've wired in is faster and easier with the pigtails, where you just undo the wire nuts and the part is in your hand. You can then conveniently remove the pigtails and attach them to a new part in a more comfortable or ergonomic location. Sure, a contractor who is trying to speed up things and has no plans to maintain the work later will save a few minutes by wiring directly, but a homeowner who knows that they are going to swap out that hideous almond non-GFCI outlet for a white GFCI outlet once they get to the store is well-served to spend the extra time on the pigtails.

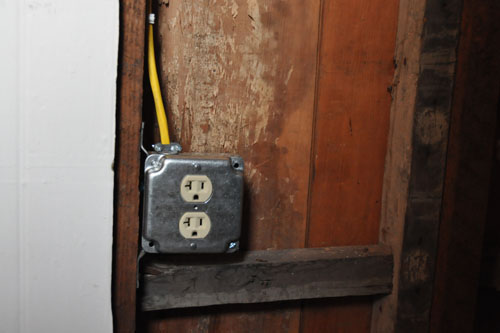
And there we go. A 20-amp outlet in the hallway so we don't have to run an extension cord from the attic to power the work light. When we get the pieces we need, it will become a GCFI outlet for running power tools, which is handy to have (we have another such outlet, in the front bedroom, which we have been using to power things, and there's also one in the front parlour which is not so useful for work upstairs).

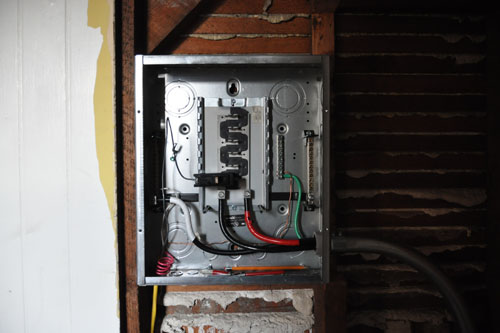
And there it is, wired in place in the box. As you add outlets, you stick these little black circuit breaker boxes into the panel -- you can see the one for the outlet at the bottom. The size of the panel determines how many breakers you can install, but each breaker is for a circuit, and a circuit can actually be pretty large. We'll have one for the upstairs lights, one for the upstairs outlets, a couple for specific things in the bathroom that are required to have their own circuits. And you can see that in this panel, there is room for two rows of breakers, though certain kinds of breakers take up more space (like the previously mentioned electric dryer circuit).
In other words, we have a lot of room in this panel and it is comfortably oversized, which is a nice thing in renovations.
posted by ayse on 04/20/14