I'm a Handrail
The last couple of weeks have included what can only be described as painfully slow progress on interior finishes. Basically, we have two carpenters at the house working on the back handrail and installing all the door hardware in preparation for painting. (They are brothers and love working together like this, so big win all around.)
What does that mean? Well, when the doors and cabinetry get painted, it's a good thing to have the hardware already installed so the holes are in the right places: you just carefully remove and document the hardware and set it aside, the painter comes through and does their thing, and then when you go to reinstall the hardware all the holes are where they need to be, and you don't need to possibly scratch up your nice paint job.
That's kind of boring to photograph. So I haven't.
How about this?
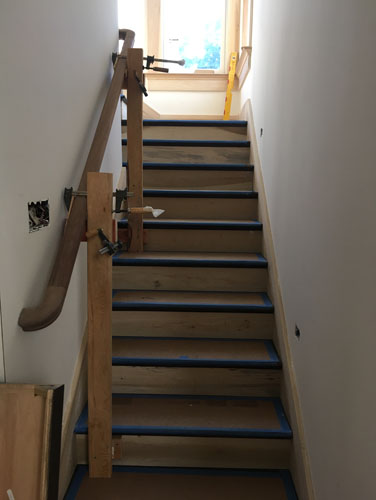
That's the start of the handrail for the back stair. The wood there is to hold it at the right height while they worked out a few little details about how it snakes around the corner and down the wall.
The somewhat tricky bit was addressing how to get the handrail to transition from the bannister configuration to a wall-mounted handrail. Ideally we would just have a wider stair where it could run straight down, but that was not what we had because of various things including the overall width of the elevator. Handrails must be continuous, too, so we couldn't just have it die into the wall and then pick up as a wall-mounted rail on the next step.
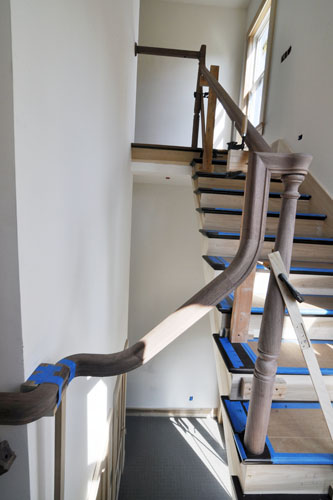
This is how we addressed that, with the use of S-curved pieces and goosenecks (the transition down from the newel post). Fortunately the stair parts manufacturer offers prefab pieces that you can just choose from a catalog, so they didn't have to custom-manufacture any of them.
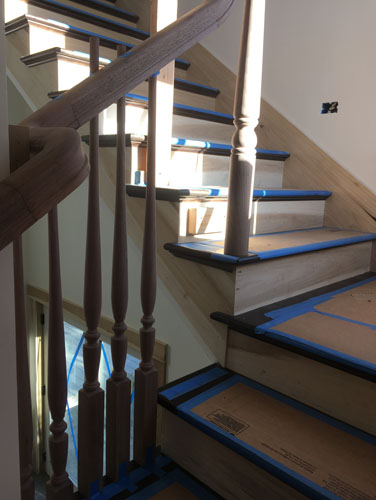
And here are the balusters being installed. They were able to get ones with a longer top pin, so we have the same detail of balusters stepping up the stairs as we have in the front.
Because the building code requires that guardrails have no opening large enough to fit a 4" ball through, we have three balusters on each step here. That ensures that at the top where the pin tops get really narrow, there is still enough coverage to meet the code. If you're wondering where that code requirement comes from it is because of babies of crawling age getting their heads stuck in railings. Usually just resulting in a hysterical crawler, but a couple of times resulting in a tragedy. Grim.
Anyway, I bet after a long silence you want more than just a couple of construction photos, right?
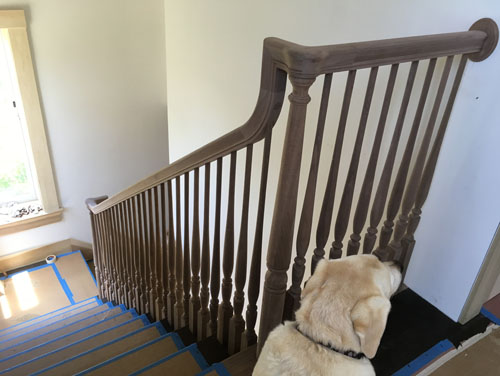
How's that for you? A finished handrail. I think it looks really graceful. Bunny also likes it.
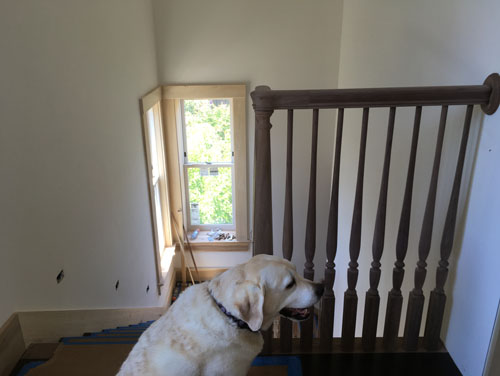
In doing this handrail I wanted something fairly simple but also still nodding to the Victorian period. This handrail would have been unacceptably plain to the Victorians, which makes it perfect for a back, service staircase. This style is generally called transitional, because it leans both backwards to the Victorians and forward into today.
I've done many home renovations where what the owner wanted as an entirely modern interior. But I'm happy to let this house be what it wants to be, and leave the original details in place (with some repair). And because of that I wanted the addition to acknowledge those details. I think this handrail does a great job of both nodding to the front stairs and being its own, new thing. It's going to look amazing when it is finished.
posted by ayse on 07/20/17