Posting About Posts
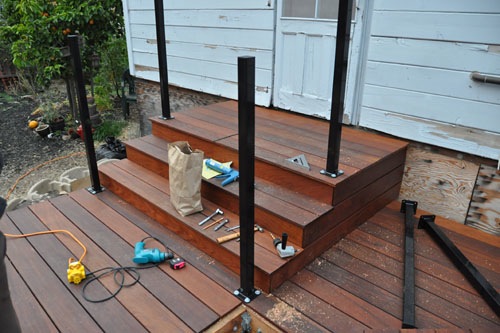
Even as I type, Noel is out on the deck attaching posts. They're kind of addictively easy, compared to just about everything else on the deck so far. Since the last post about them was kind of dark and weird with the work lights and Noel trying to photograph himself, I thought I'd show you how it goes.
He starts by figuring out where the post goes. This is the hard part, only it's not that hard. Th posts obviously need to go where they are needed, and it's pretty straightforward to line them up nicely and square.
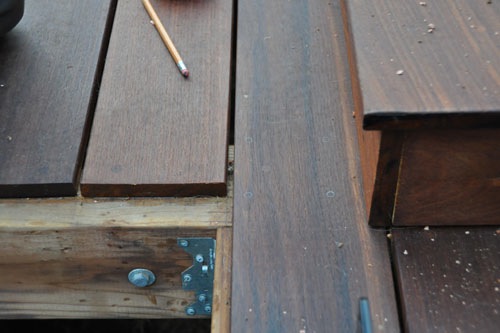
Those are the holes in the post, traced with pencil.

Noel knocks a little dent in the ipe with a nail set to help the drill get started straight. With such a hard wood you need all the help you can get.
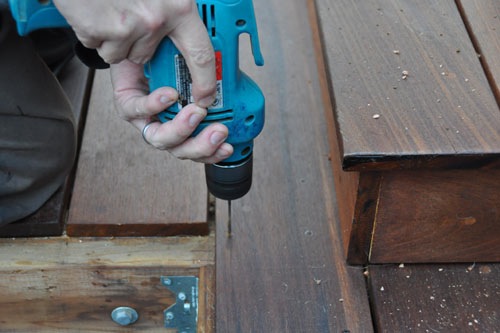
Then he drills a pilot hole through the ipe and the redwood structure.
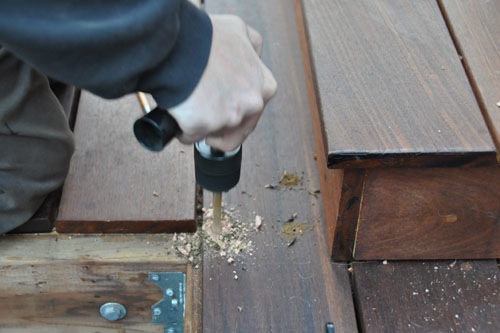
Using a larger drill bit, he drills the main bolt hole through the ipe and the redwood. He's using our 90-degree angle attachment on the drill here so he can apply force directly down and evenly.
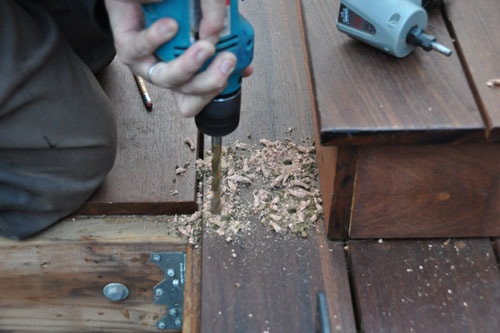
Then, since the ipe was cracking because it is so strong and stiff, he drills an even larger hole through just the ipe. We want the bolts to grab in the redwood their full length, so that part of the hole stays normal-sized.
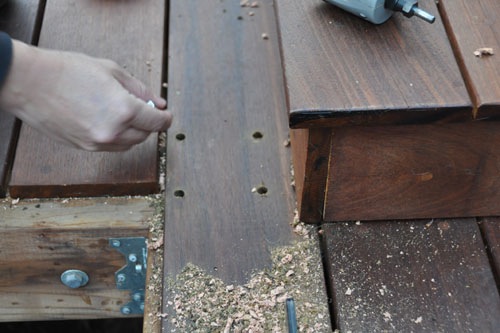
All that drilling makes a big pile of shavings, so he blows that away and kind of wipes the extra out of the way as well.
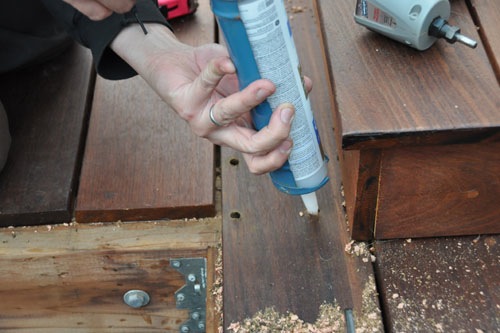
To help protect the structure of the deck, he adds silicone sealant to the holes. I chose clear sealant, even though it's not actually visible under the posts, so if it spills or drips it won't be totally obvious. Black would also work.
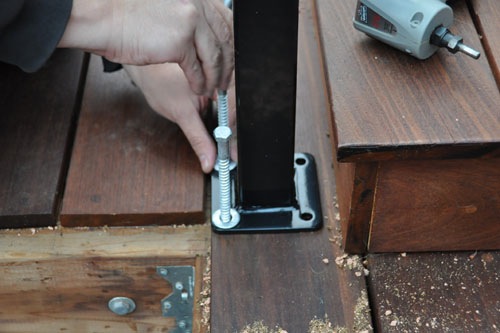
Then it's time to attach the post. We're using lag bolts, even though this railing system specifically calls for a particular framing setup and regular bolts. I did the load calculations then oversized the bolts by 50%, and I'm satisfied that these lag bolts meet the load requirements for railings. I do not recommend this approach unless you are certain what you are doing and also willing to accept that the railing is no longer covered by a warranty.

In short order, the post is bolted in place. You can see some of the excess silicone sealant squeezing out under the deck board to the left of the post.
posted by ayse on 08/31/12